Category Archives: Mobility

Foam Rolling Is Essential

indy core fitness foam rolling for runners

Did you know that poor blood flow and knots in your muscles will keep you from burning calories and losing weight? Foam rolling needs to become part of your workout to help keep your fat burners working at 100 percent.

Foam rolling is an excellent technique to recover after strenuous activity. Athletes can use this technique the same day or the day after a hard workout.

Myofascial Release applies pressure to parts of the body in order to release tension. During your workout scar tissue can form in the muscle creating little knots. In addition to “removing” those little knots, this recovery technique can lead to greater joint mobility and range of motion.

Foam rolling will improved blood circulation in the muscle. The muscle will repair faster due because the problem areas are getting more nutrients with increased blood-flow. Foam rolling is also great for stretching your muscles because it helps to relieve the tightness and knots that come with regular high-intensity workouts.

In the video below, Megan demonstrates two techniques to release this tension and remove the knots in your legs. Both of these recovery techniques are great for runners or those who have done a lot of running for their cardio exercise regime.

  • Calf Foam Roll: Start at your achilles tendon and work your way up to the back of your knee. As you roll note any sensitive points and apply the rolling motion back and forth and side to side. Work each area for about two minutes. Repeat the process for the other leg.
  • Thigh Foam Roll: This technique focuses on the side of your thigh. Start at the fibular head and roll to the top of the thigh. Again, you want to pay attention to those areas where there is sensitivity and tension. Roll for two minutes on each side.

To learn more give us a call at 317-973-1677 or email us at kim@indycorefitness.net.  We are open from 5:00am to 8:00pm.

FIT in Your Recovery

By: Megan Lambert

Previous posts have addressed topics such as foam rolling, voodoo flossing, stretching and flexibility, as well as active recovery techniques. Adding on to this theme, in the third part of the FIT series, we will discuss how to practically apply recovery techniques in your busy schedule.

5 simple ways to incorporate recovery techniques in your daily life:

  1. Take a break every 1-2 hours.

If your job includes sitting in an office chair or staring at a computer screen for eight hours a day, then this tip is especially applicable for you. Every few hours, make a conscious effort to stand up, walk around the room, do a few stretches. Give yourself a short break. Not only will your muscles thank you, but you may even return to your task more alert and focused.

  1. Carry a lacrosse ball in your purse or briefcase.

When you have a random five minutes at the doctor’s office or are waiting in the school carpool line to pick up your daughter, you could spend those five minutes scrolling through Facebook, Twitter, or Instagram. Or, you could use a lacrosse ball to target sore muscles from your workout the day before!

  1. Carry a gallon jug of water with you.

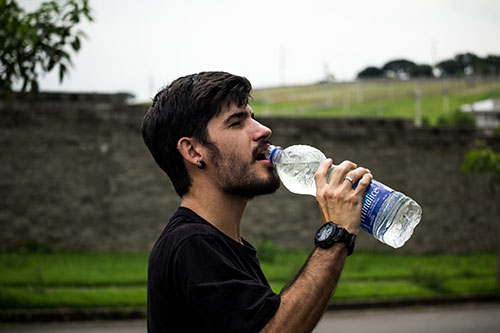
Are you drinking enough water every day? One way to hydrate is to keep a gallon of water in your car. That way, when your water bottle is empty and you are out of the house, all you need to do is fill it up again and keep drinking.

  1. Foam roll or stretch while watching TV.

It is easy to get sucked into mindlessly watching television to unwind at the end of the day. And it is a good thing to unwind! But, what if you devote 20 minutes of the hour in a half you spend on the couch working on your flexibility and mobility? That 20 minutes will go a long way toward reaching your goals.

  1. Start your morning with a mobility exercise.

Before brushing your teeth, eating your breakfast, or taking a shower, begin your day by performing one movement that will benefit your body and help your mobility. Some examples include rolling the bottom of your feet on a lacrosse ball, performing 10 slow squats, and doing a hip stretch. This way, you set a precedent at the beginning of the day that you are going to resist the urge to ignore your sore muscles and help your body recover.

H2O Analysis: the ins and outs of water consumption

By: Matt Nicholson & Megan Lambert

Water makes up 45-70% of your body weight, according to Joan’s Salge Blake’s book, “Nutrition and You,” (2nd ed.).

Everyone talks about the importance of hydration, but how do you know if you should be consuming more?

Chris Kresser, a renowned natural health and nutrition professional says in his article entitled, “Hydration 101: How Much Water Do You Really Need,”

“There is no universal requirement for water intake, and your needs will vary widely based on age, gender, body size, health status, and physical activity levels.”

If the requirements vary, then what are his recommendations? He suggests utilizing your body’s thirst mechanism as an indicator for the amount of water to drink, instead of a specific amount.

In addition to the thirst mechanism, it is a good idea to monitor the amount of fluid you drink after exercise. One guideline according to Blake, is to replace each pound (lb) of weight lost during a workout with one pint (0.5L) of water.

Additionally, our Indy Core coaches recommend that you drink 8-10 ounces of water 20-30 minutes prior to an athletic practice, competition, or workout session.

What does drinking enough water do for your body?

  1. Increases energy levels
  2. Reduces fatigue
  3. Improves memory
  4. Enhances cognitive function
  5. Promotes quicker post-exercise recovery
  6. Improves joint lubrication
  7. Supports your body’s immune system
  8. Prevents overeating
  9. Promotes satiety
  10. Improves blood flow

8 Exercises to Add to Your Warm-up

By: Megan Lambert

Before the Chicago Cubs and the Cleveland Indians began Game 7 of the World Series last night, each team warmed-up on the baseball diamond, throwing, catching, jogging, stretching, etc.

Just like an MLB player, athletes and weekend gym warriors need to warm-up their muscles before lifting weights, running, or doing cardiovascular exercise. Consequently, check out the following eight movements designed to prepare the ankles, hips, shoulders, and thoracic spine for exercise.

  1. Standing hip circles

For this movement, stand on one foot and bring the other leg up to a 90 degree angle. Take your knee up, out to the side, and back behind your center of mass to make a complete circle. Make 6-10 circles forward and then reverse the motion to make 6-10 backwards circles with the same leg. Repeat with the opposite leg.

  1. Sumo squats

Stand with your feet slightly wider than shoulder width apart, with your toes facing forward. Bend down to touch your toes and then drop your hips as low as you can, keeping your knees pushed out and your chest up. Then, raise your arms above your head and push through your heels to return to a standing position. Repeat for 6-10 reps.

  1. Monster walks

Place a small resistance band two inches above your knee. To begin, stand with your feet shoulder width apart in a ¼ squat position. From here, push off of your left foot while maintaining your squatting position. Then, bring your right foot back underneath your center of mass to return to your original position. Repeat these movements over a 10-15 meter area, and then repeat in the opposition direction.

  1. Band pull-aparts

Hold a resistance band straight out in front of you, with your hands slightly wider than shoulder width. For this exercise, your goal is to try to pull your hands as far apart from each other as you can. This is be accomplished by pinching your shoulder blades together. Repeat for 10 reps.

  1. Open book stretch

Lie on your side with your knees bent to 90 degrees. From this starting position, place your arms out to the side. Keeping your legs on the ground, move your top arm across your body to the ground on the other side of your body. The goal is to open up your chest and to increase mobility in your thoracic spine. Repeat for 6-10 reps each side.

  1. Scorpions

For this movement, lie on your stomach with your arms straight out from your sides. Bend one knee to 90 degrees and lift your hip off the ground by squeezing your glutes and driving your heel in the air. From there, reach your heel across your body toward your opposite hand. You should feel a stretch through your abdomen and hip flexor, as well as in your mid-back.

  1. Walking straight leg deadlifts

To begin, stand on one foot. Reach one foot straight behind the body while keeping your torso in a straight line. It is important to keep your core engaged during this movement so that your spine stays in a neutral position, meaning it doesn’t flex or extend. Another tip for the extended leg is to lead with your hamstrings. This places the tension in your leg, not in your lower back.

  1. Inchworm

Stand with your feet together. Keeping your legs straight, reach down toward your toes. Once in this position, walk your hands out in front of you until you are in a push-up position. From here, walk your feet back up to your hands. Repeat this process for at 15-20 yards.

Active Recovery – is it really necessary?

By: Megan Lambert

What do you do on your days off from the gym?

Do you lie on the couch and watch TV all afternoon? Or, do you go to the track and do a sprint workout, thinking, ‘this is recovery because I’m not lifting weights.’ Many people find themselves on either side this spectrum, but in reality, there is a third recovery option that is much more beneficial. To illustrate this point, read the following excerpt from chapter 11 (page 147) of Mark Verstegen’s book, “Core Performance.”

“Most fitness programs take an all-or-nothing approach. When you’re training, you train very hard. And when you aren’t training, you do nothing. No matter the circumstances, you do it all or you do nothing.

The problem with that formula is that it fails to facilitate one of the most important aspects of training: the repair of muscles and cells. If you’re sore from a workout, for example, you have two bad choices: Go out and give yourself an equally brutal workout, or do nothing.

In truth, you need to combine quality work with quality rest to get the results you want.

…But regeneration is also a lifestyle philosophy, a recognition that you need to plan ways to recover – mentally and physically – in all areas of your life. You experience the benefit of work on the days you rest.

There is a big difference between rest – doing nothing at all – and “active rest.” In the latter, you take a break from serious training but still do things that benefit your body, such as playing golf, tennis, or basketball. Wednesdays and Saturdays are lighter days of the Core Workout, so you might use those days, and/or Sundays, to play your favorite sport. You’re not training per se, but you’re still getting the benefit of physical activity. Not only that, you’re having fun.

We call it active recovery, because you’re making a modest effort. There’s also passive recovery, which includes getting a massage and sitting in a hot tub or a cold plunge. Both elements of recovery are not only important but also necessary. And not only necessary, but equally important as working out. If you don’t give your body time to recover, it’s never going to improve.”

In addition to playing sports, other active recovery options include yoga, Pilates, and low-impact dynamic exercise. To learn how to implement quality rest-day workouts into your exercise protocol, come visit us at Indy Core Fitness & Wellness. We would love to create a personalized program specific to you and your goals. Please visit our website (www.indycorefitness.net) or give us a call (317-430-0063) today.

Foam Rolling 101

By: Megan Lambert

If you enjoy reading this blog, check out our new YouTube page! This page will provide visual content to correlate with the  written content posted on this blog. Check out the following video explaining self-myofascial release and how incorporate it into your recovery methodology.

Voodoo Flossing: the contemporary approach to injury

By: Megan Lambert

What is voodoo flossing?

Contrary to your first impression, voodoo flossing is a modern method of injury rehabilitation, workout recovery, and joint mobilization, not a medieval torture device.

In essence, it is an extreme form of compression. Pressure is applied to an area of the body using a thin, stretchy band like the one shown below.

floss

Once, lets say, your ankle is wrapped with the voodoo wrap, all you have to do is perform normal movement patterns. For example, one would walk forwards and backwards, do body weight squats and calf raises, while wearing the wrap.

After leaving the band on for up to two minutes, the band is removed and normal blood flow is restored to the area.

This modality is useful for athletes recovering from workouts, individuals rehabbing tendon or ligament injuries, and anyone striving to attain greater joint mobility.

Why do you use flossing?

It’s no secret that your body’s tendons and ligaments have a smaller blood supply than your muscles. These connective tissues receive less oxygen and nutrients from the blood, so when injury occurs, it takes longer for the tissues to heal. One way to help these tissues heal faster is by increasing the blood flow to the area. Enter voodoo flossing.

Wrapping the flossing band around the injured area limits the amount of blood that can enter the area. When the wrap is removed, the blood rushes back into that area of the body. Not only does this bring a greater amount of blood to the area than before, but it also brings with it more oxygen and nutrients.

How does Indy Core use flossing?

Recently, we used flossing to alleviate peroneal tendon pain for one of our clients. At the risk of sounding like a boring anatomy professor, this tendon is located on the lateral side of the leg and runs from the head of the fibula, down the leg and inserts near the base of the big toe. After examining his leg, we discovered that the source of the pain was in the peroneal and calf muscles, not behind in his ankle where he felt the most discomfort.

Consequently, we wrapped the band around his upper calf (like the picture below) where we felt the most scar tissue and tissue adhesion.

floss-2

After approximately two minutes of walking backwards and forwards and doing squats and stretches, the client took the band off and felt relief from the pain. This is just one example of how we utilize this modality in our practice every day.

Thank you for reading and stay tuned for a video detailing more about flossing.

For more information about how you can utilize flossing in your workouts, call Indy Core at (317) 430-0063.

5 Stretches to do while Watching TV

By: Megan Lambert

Everyone knows that improving muscle flexibility enhances joint function, muscle stiffness, and overall mobility.

But, let’s be real. Who actually takes the time to stretch every day?

That’s why we are presenting five simple stretches to do while watching your favorite prime-time TV show. First, perform a few exercises to get your blood flowing to the muscles you are going to stretch. For example, you could do 10 jumping jacks, 10 air squats, and 10 push-ups to warm up your upper and lower body. Then, hold each of the following stretches for at least 30 seconds. Over time, your flexibility and mobility will increase!

  1. Couch stretch

Bend one leg and place your foot behind you on the couch. Then, take the other leg and place it in front of the body at a 90 degree angle. You should feel the stretch on the front of your hip and thigh. To make the stretch more pronounced, squeeze your glutes.

stretch

2. Hamstring stretch

Sit on the floor with one leg bent towards the body and one leg straight out in front of you. Reach toward your toes with both of your hands. Keep reaching until you feel a stretch in the back of your thigh.

stretch-5

3. Back stretch

Kneel on the floor with your arms straight out in front of you. Sit your hips back to your heels to feel the stretch in the large muscles of your back. Slowly reach your hands to one side, feeling a more pronounced stretch on one side of the body and then repeat for the other side.

stretch-2

4. Cat/cow stretch

Kneel on your hands and knees on the ground. For this stretch, slowly arch your back and then round your back to feel a stretch throughout the muscles around your spine. Continue these two movements for at least 30 seconds

stretch-7   stretch-3


5. Chest stretch

Place your forearm on a wall or door frame at a 90 degree angle. Rotate your lower body away from the wall so that you feel a stretch across your chest and the front of your shoulder. Move your forearm up or down the wall to stretch the different areas of the muscle.

stretch-4